
Mustang Steve Clutch Bearing Kit – Product Review!
During my daily driving time with my ’67 Mustang around Thanksgiving, I began to notice some issues with the clutch pedal. The clutch didn’t seem to be disengaging and the pedal seemed to have a lot of motion to the side…
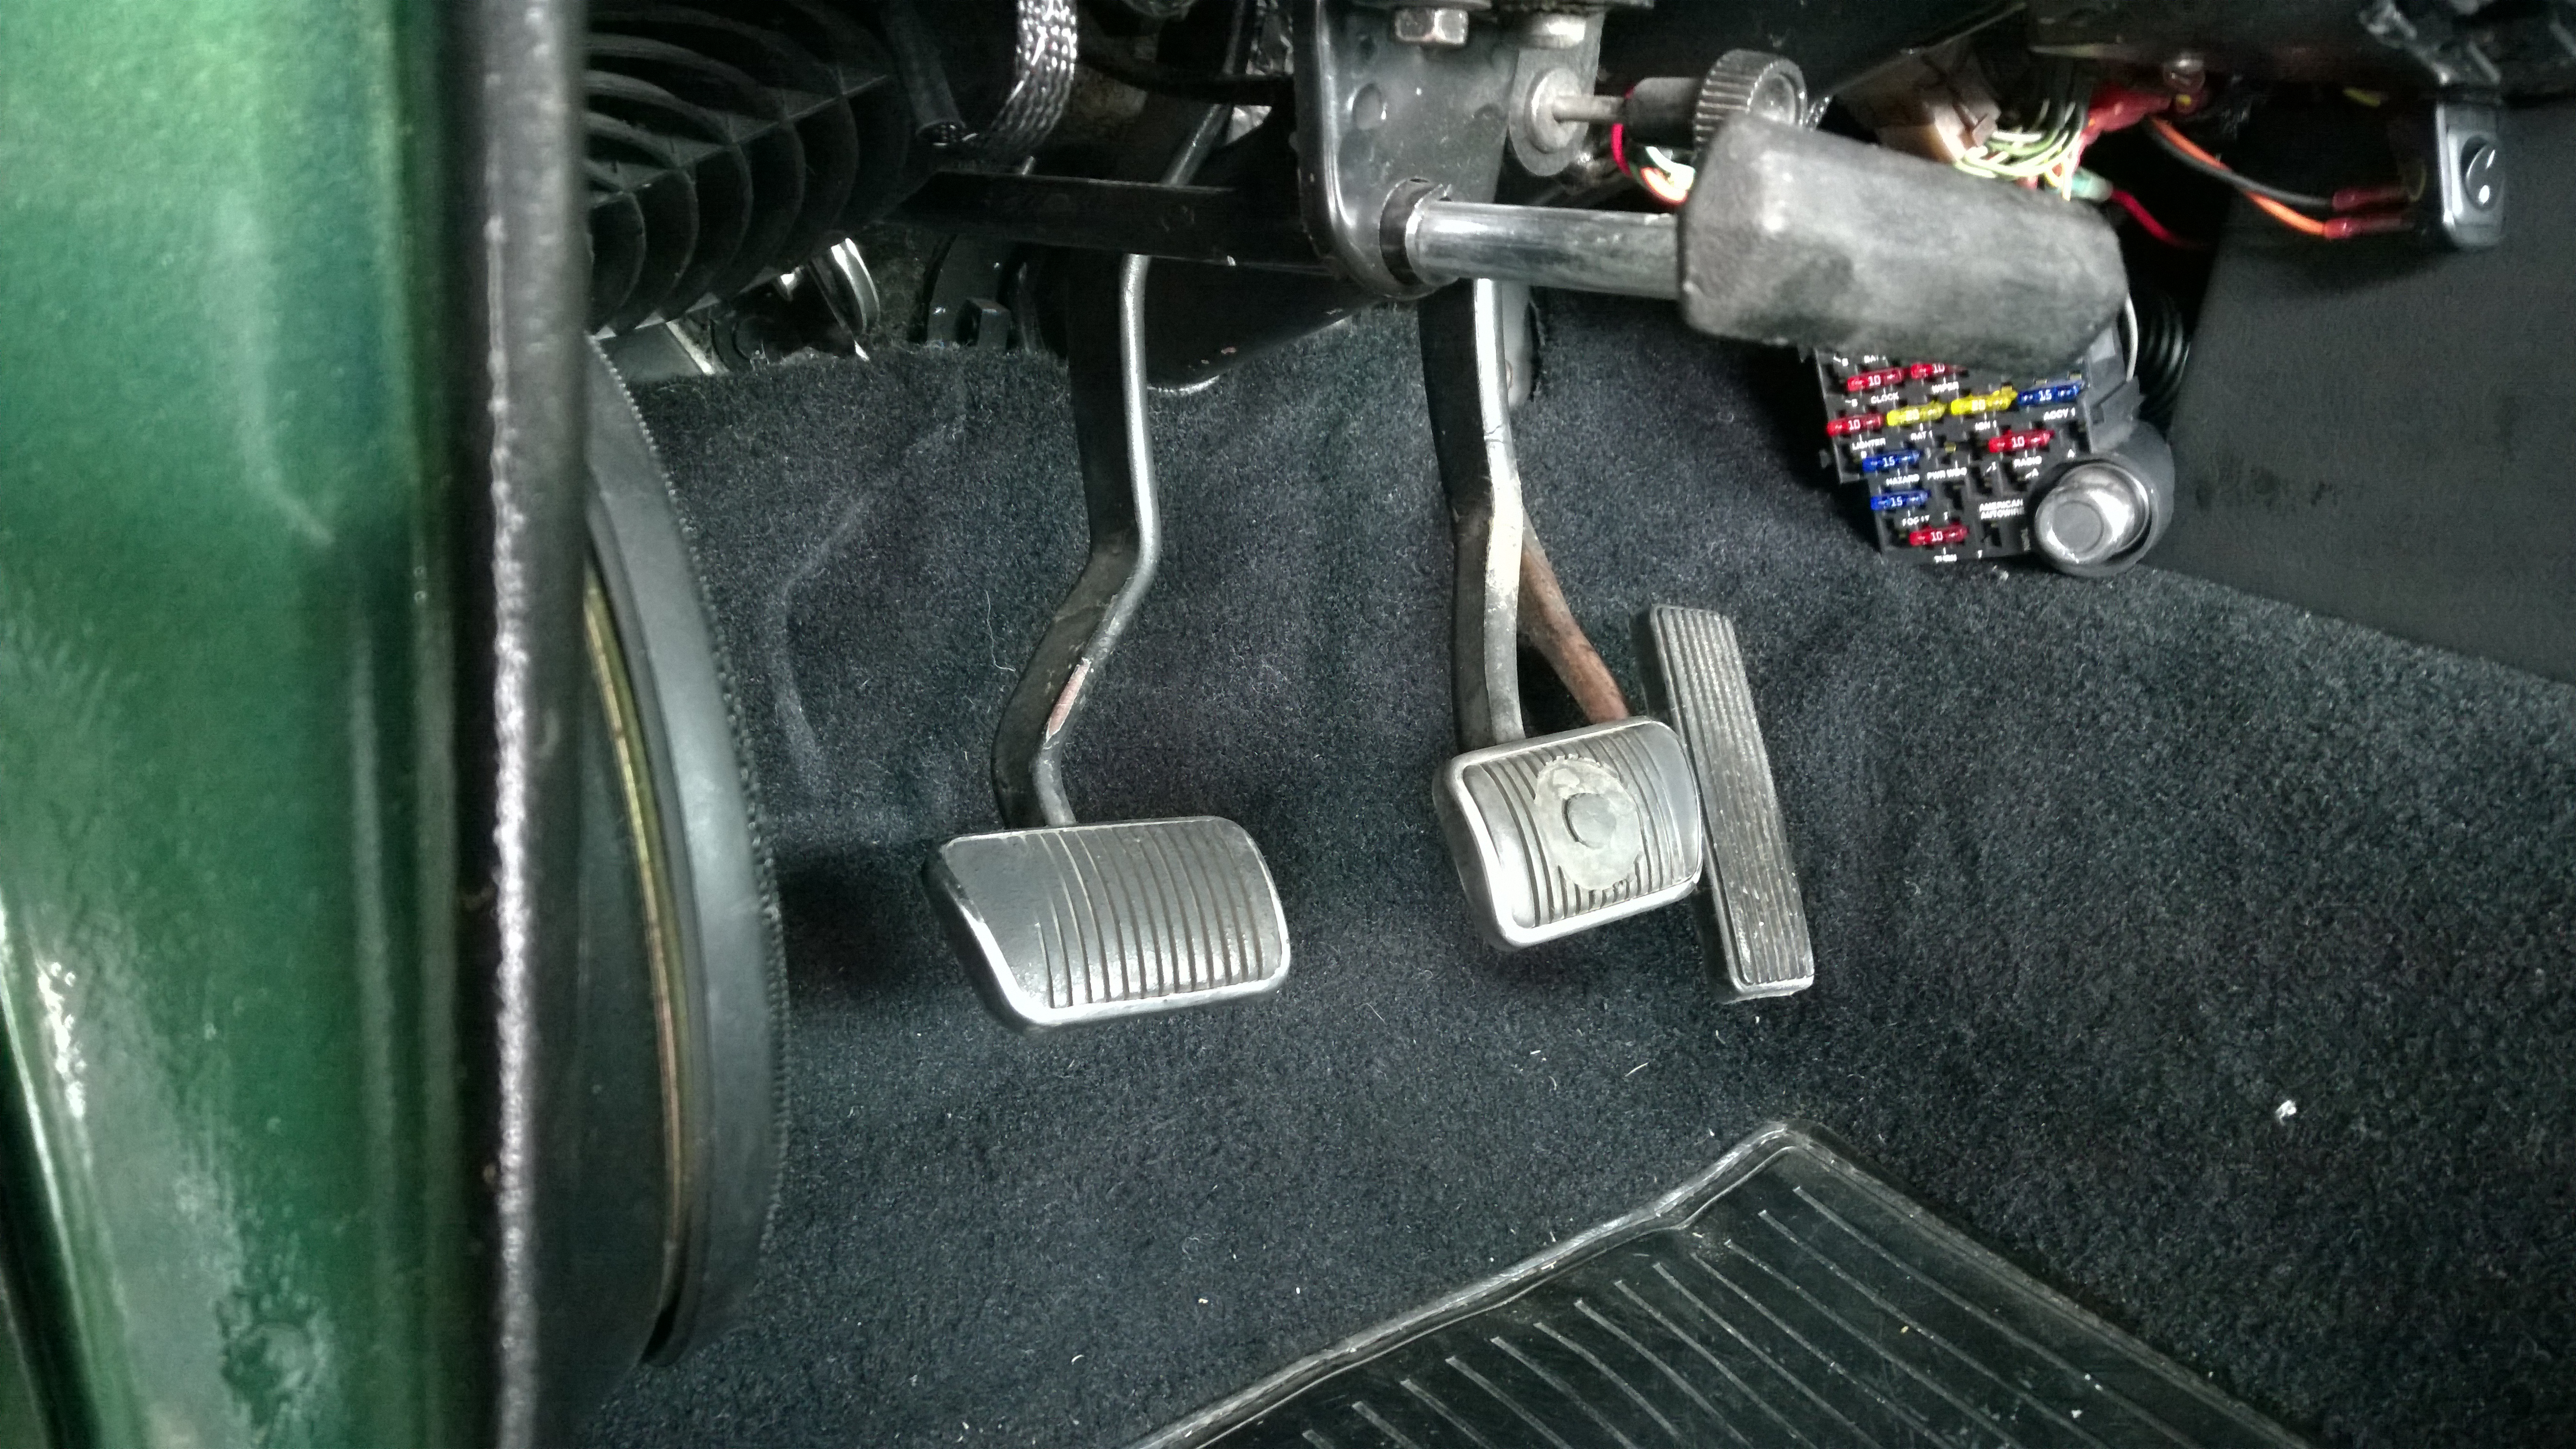
As you can see, the pedal was hanging oddly. After some research I thought this was worn out clutch pedal bushings and put in an order with Mustang Steve for one of his Ball Bearing Clutch Pedal Conversions. While I was waiting on the kit, I started tearing everything down and found more surprises. (more…)
LED Gauge Light Upgrade – Product Review!
Anyone with an older car knows that the lighting in gauges leaves something to be desired. In my ’67, I’d updated the dash with Autometer gauges; however they were still lit with old incandescent bulbs which weren’t the most readable.
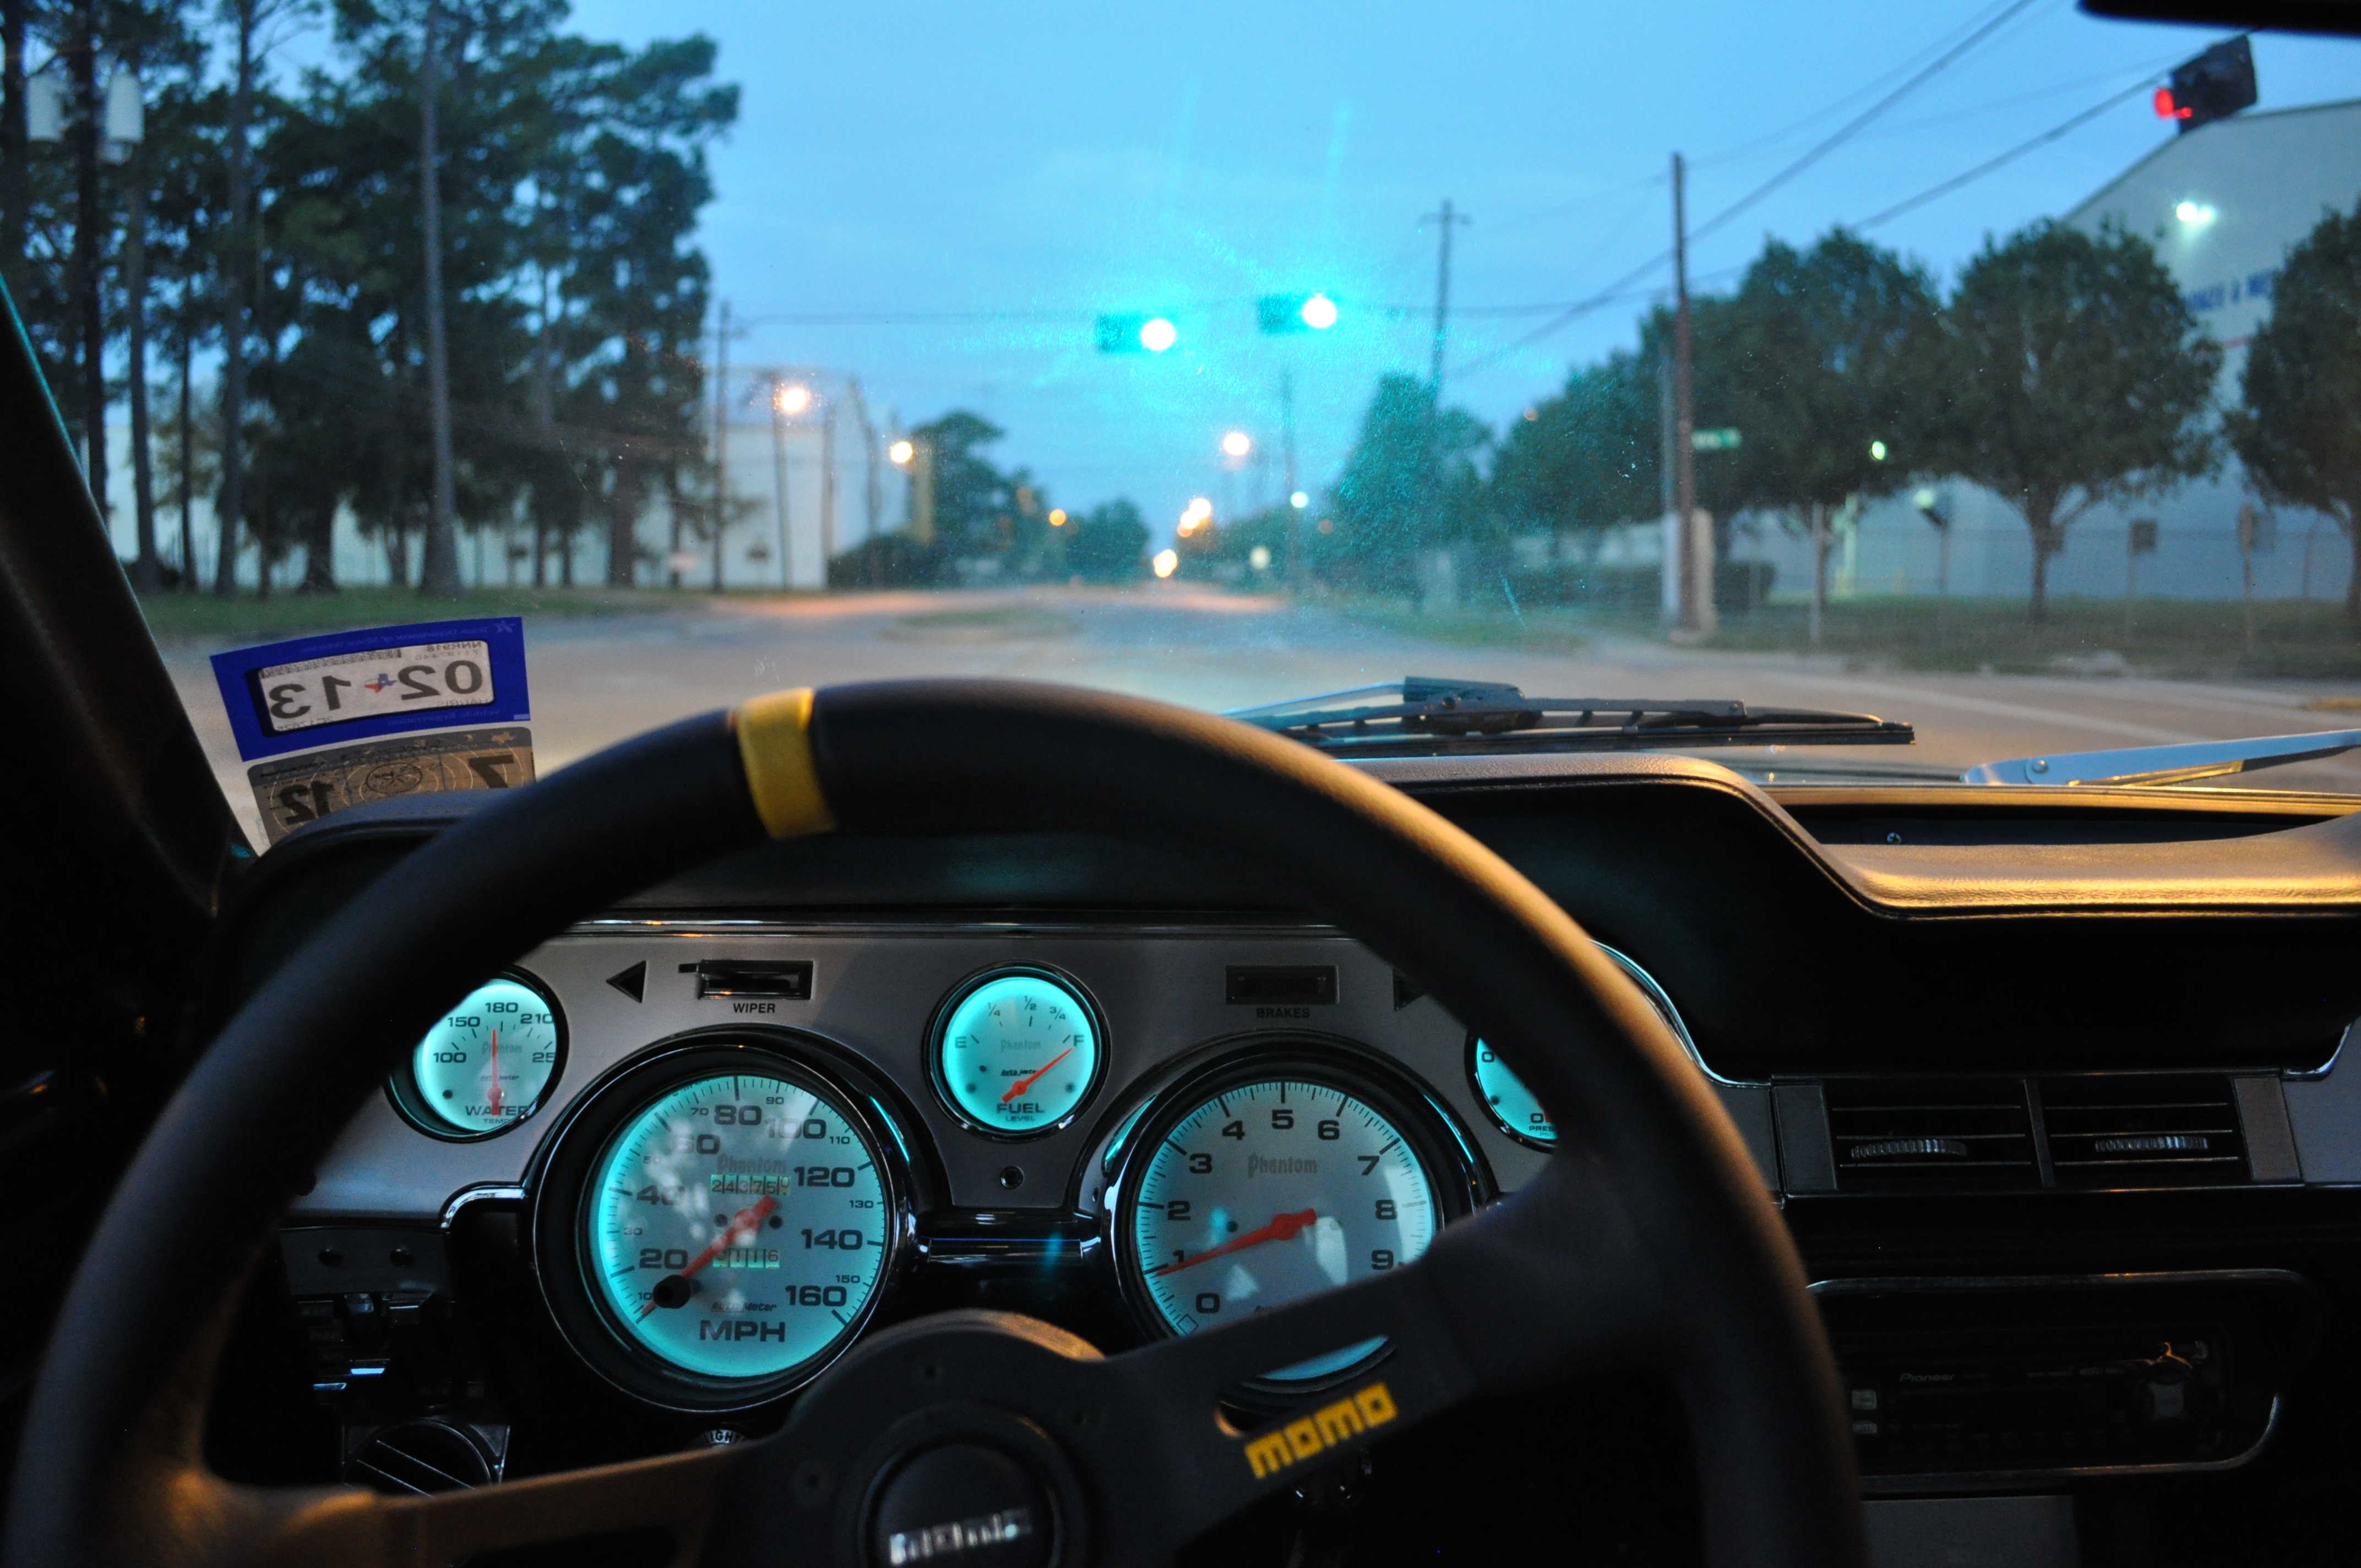
They were ok, but not ideal and certainly not up to the lighting standards in a new car. Keep in mind that these were taken at dawn, so a lot more light was coming in than in the middle of the night.
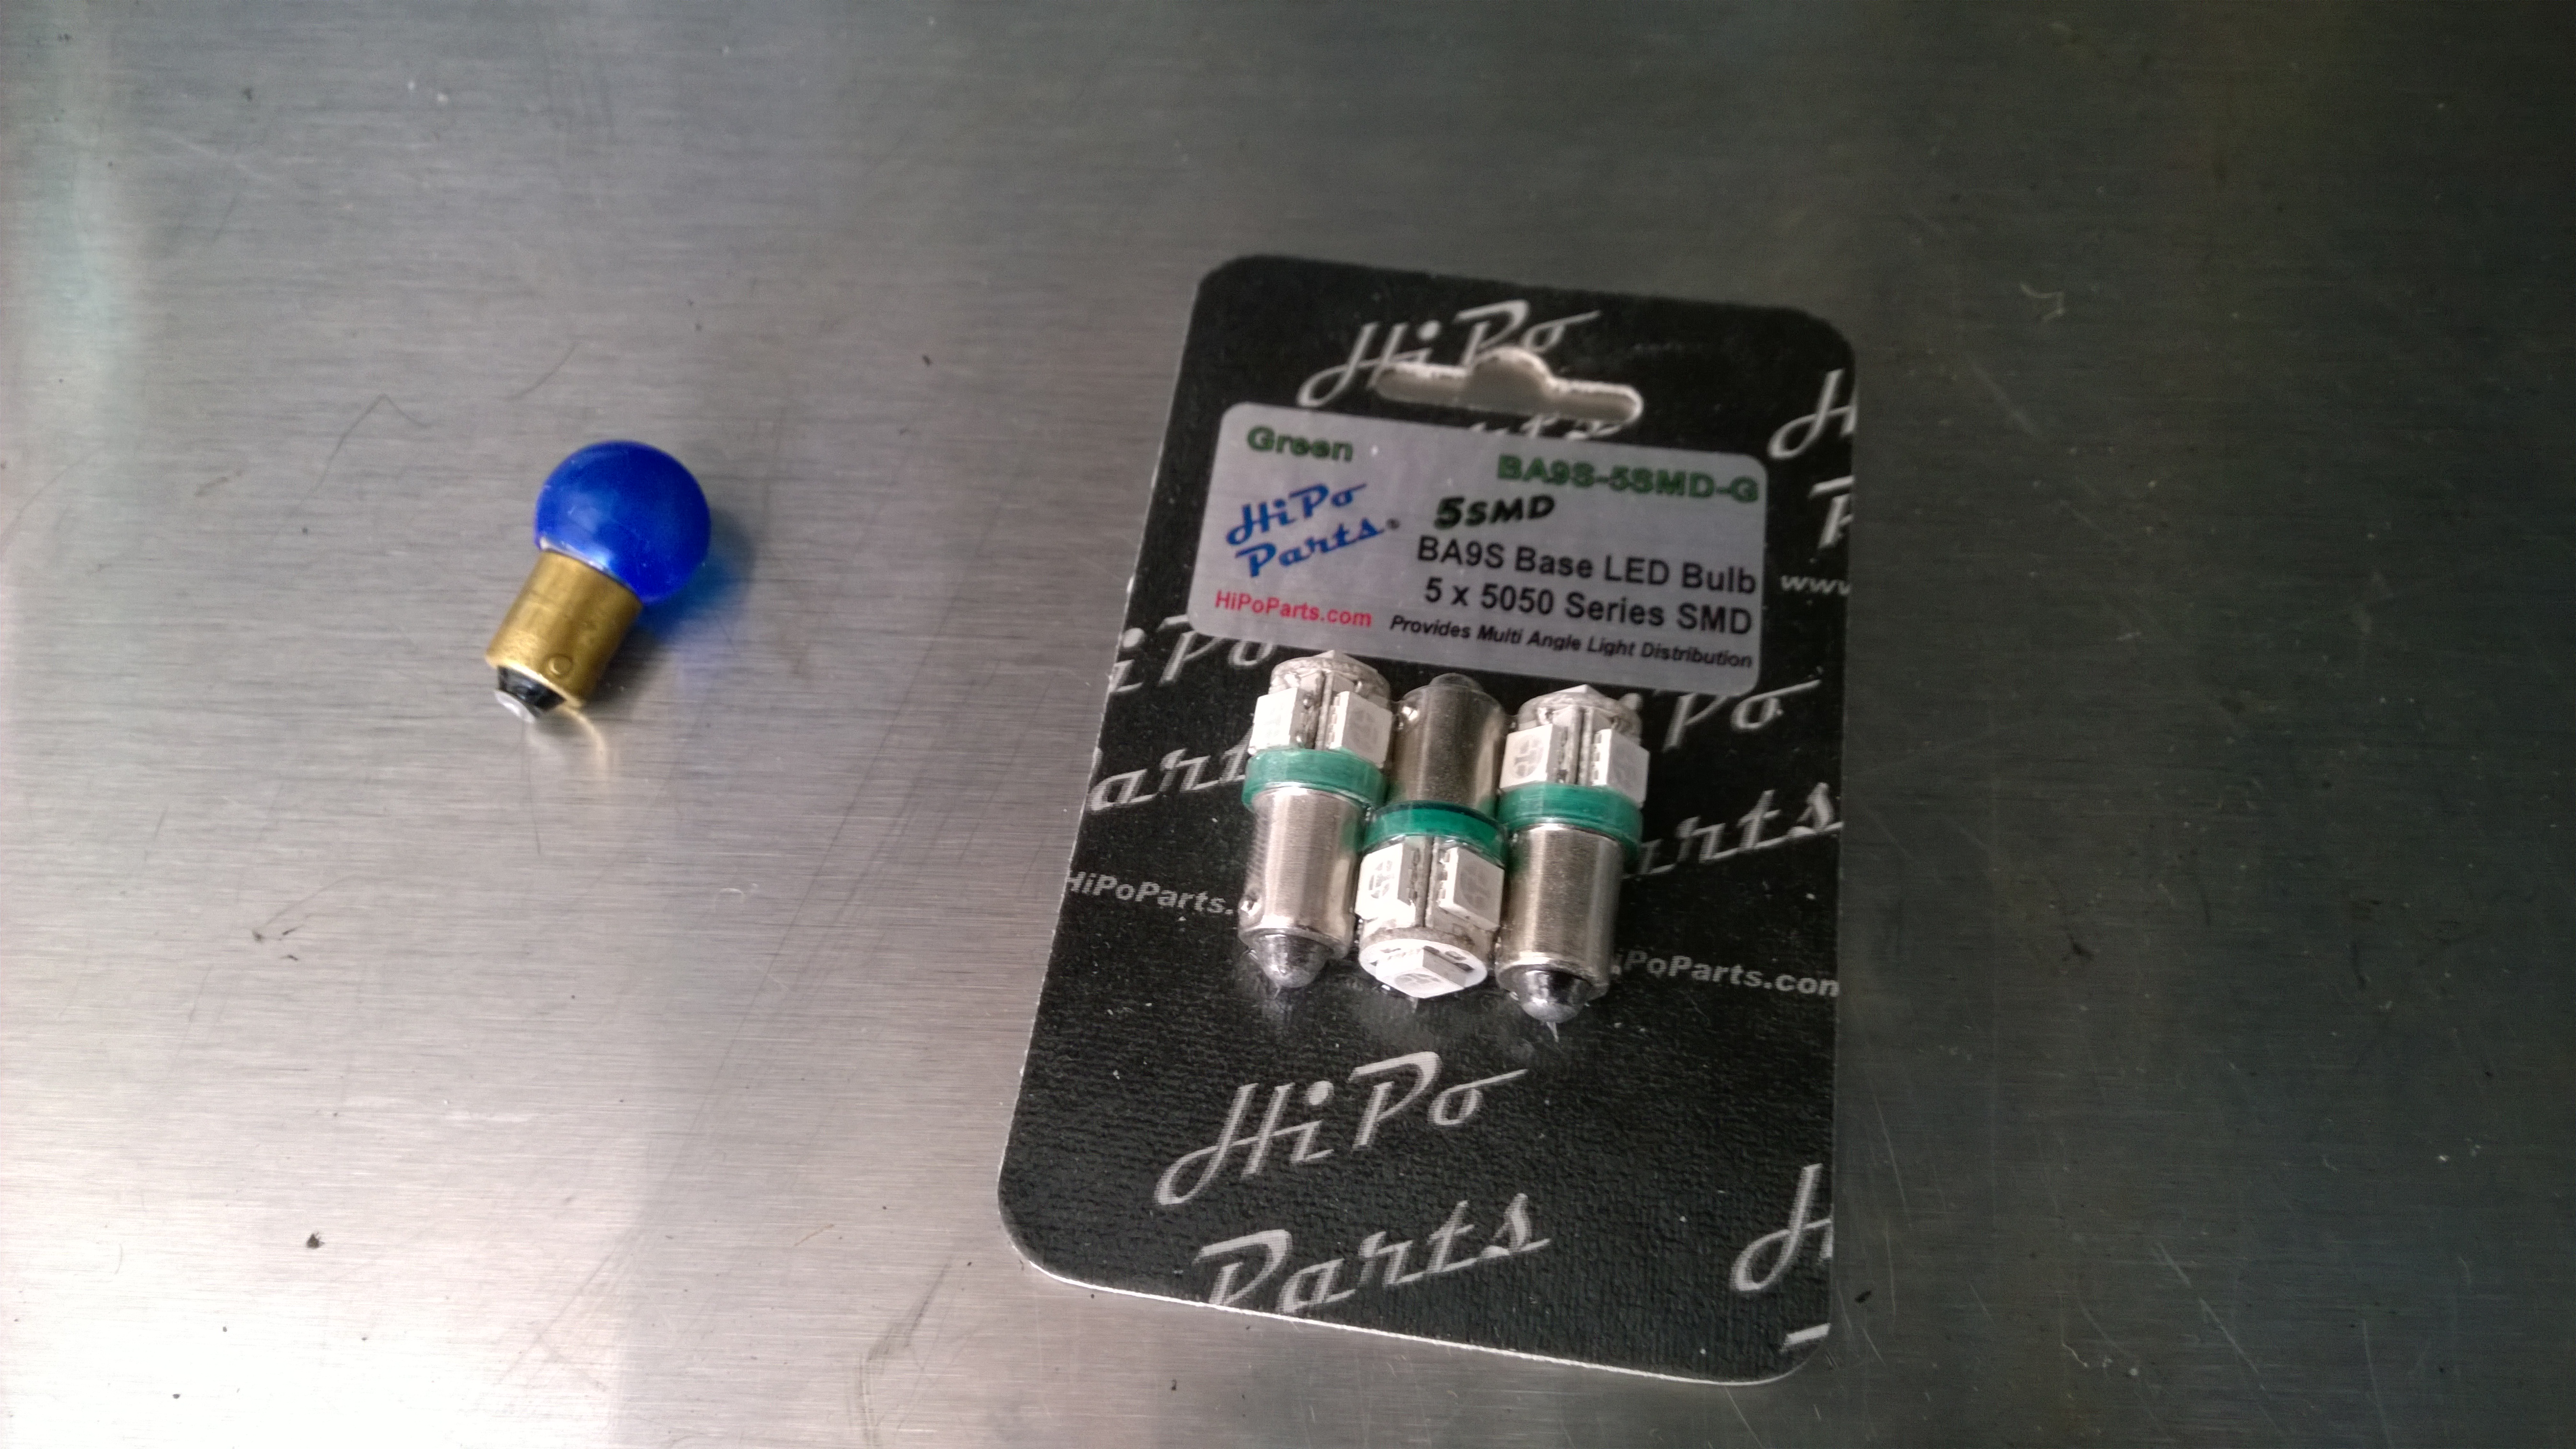
Searching for a replacement I ran across the tech articles at HiPo Parts. After some reading, I ended up selecting the Ultra Bright 5 SMD bulbs for my application. Rather than going with blue, I went back to green for a more classic look. They certainly look more high-tech than the old bulb with rubber hood!
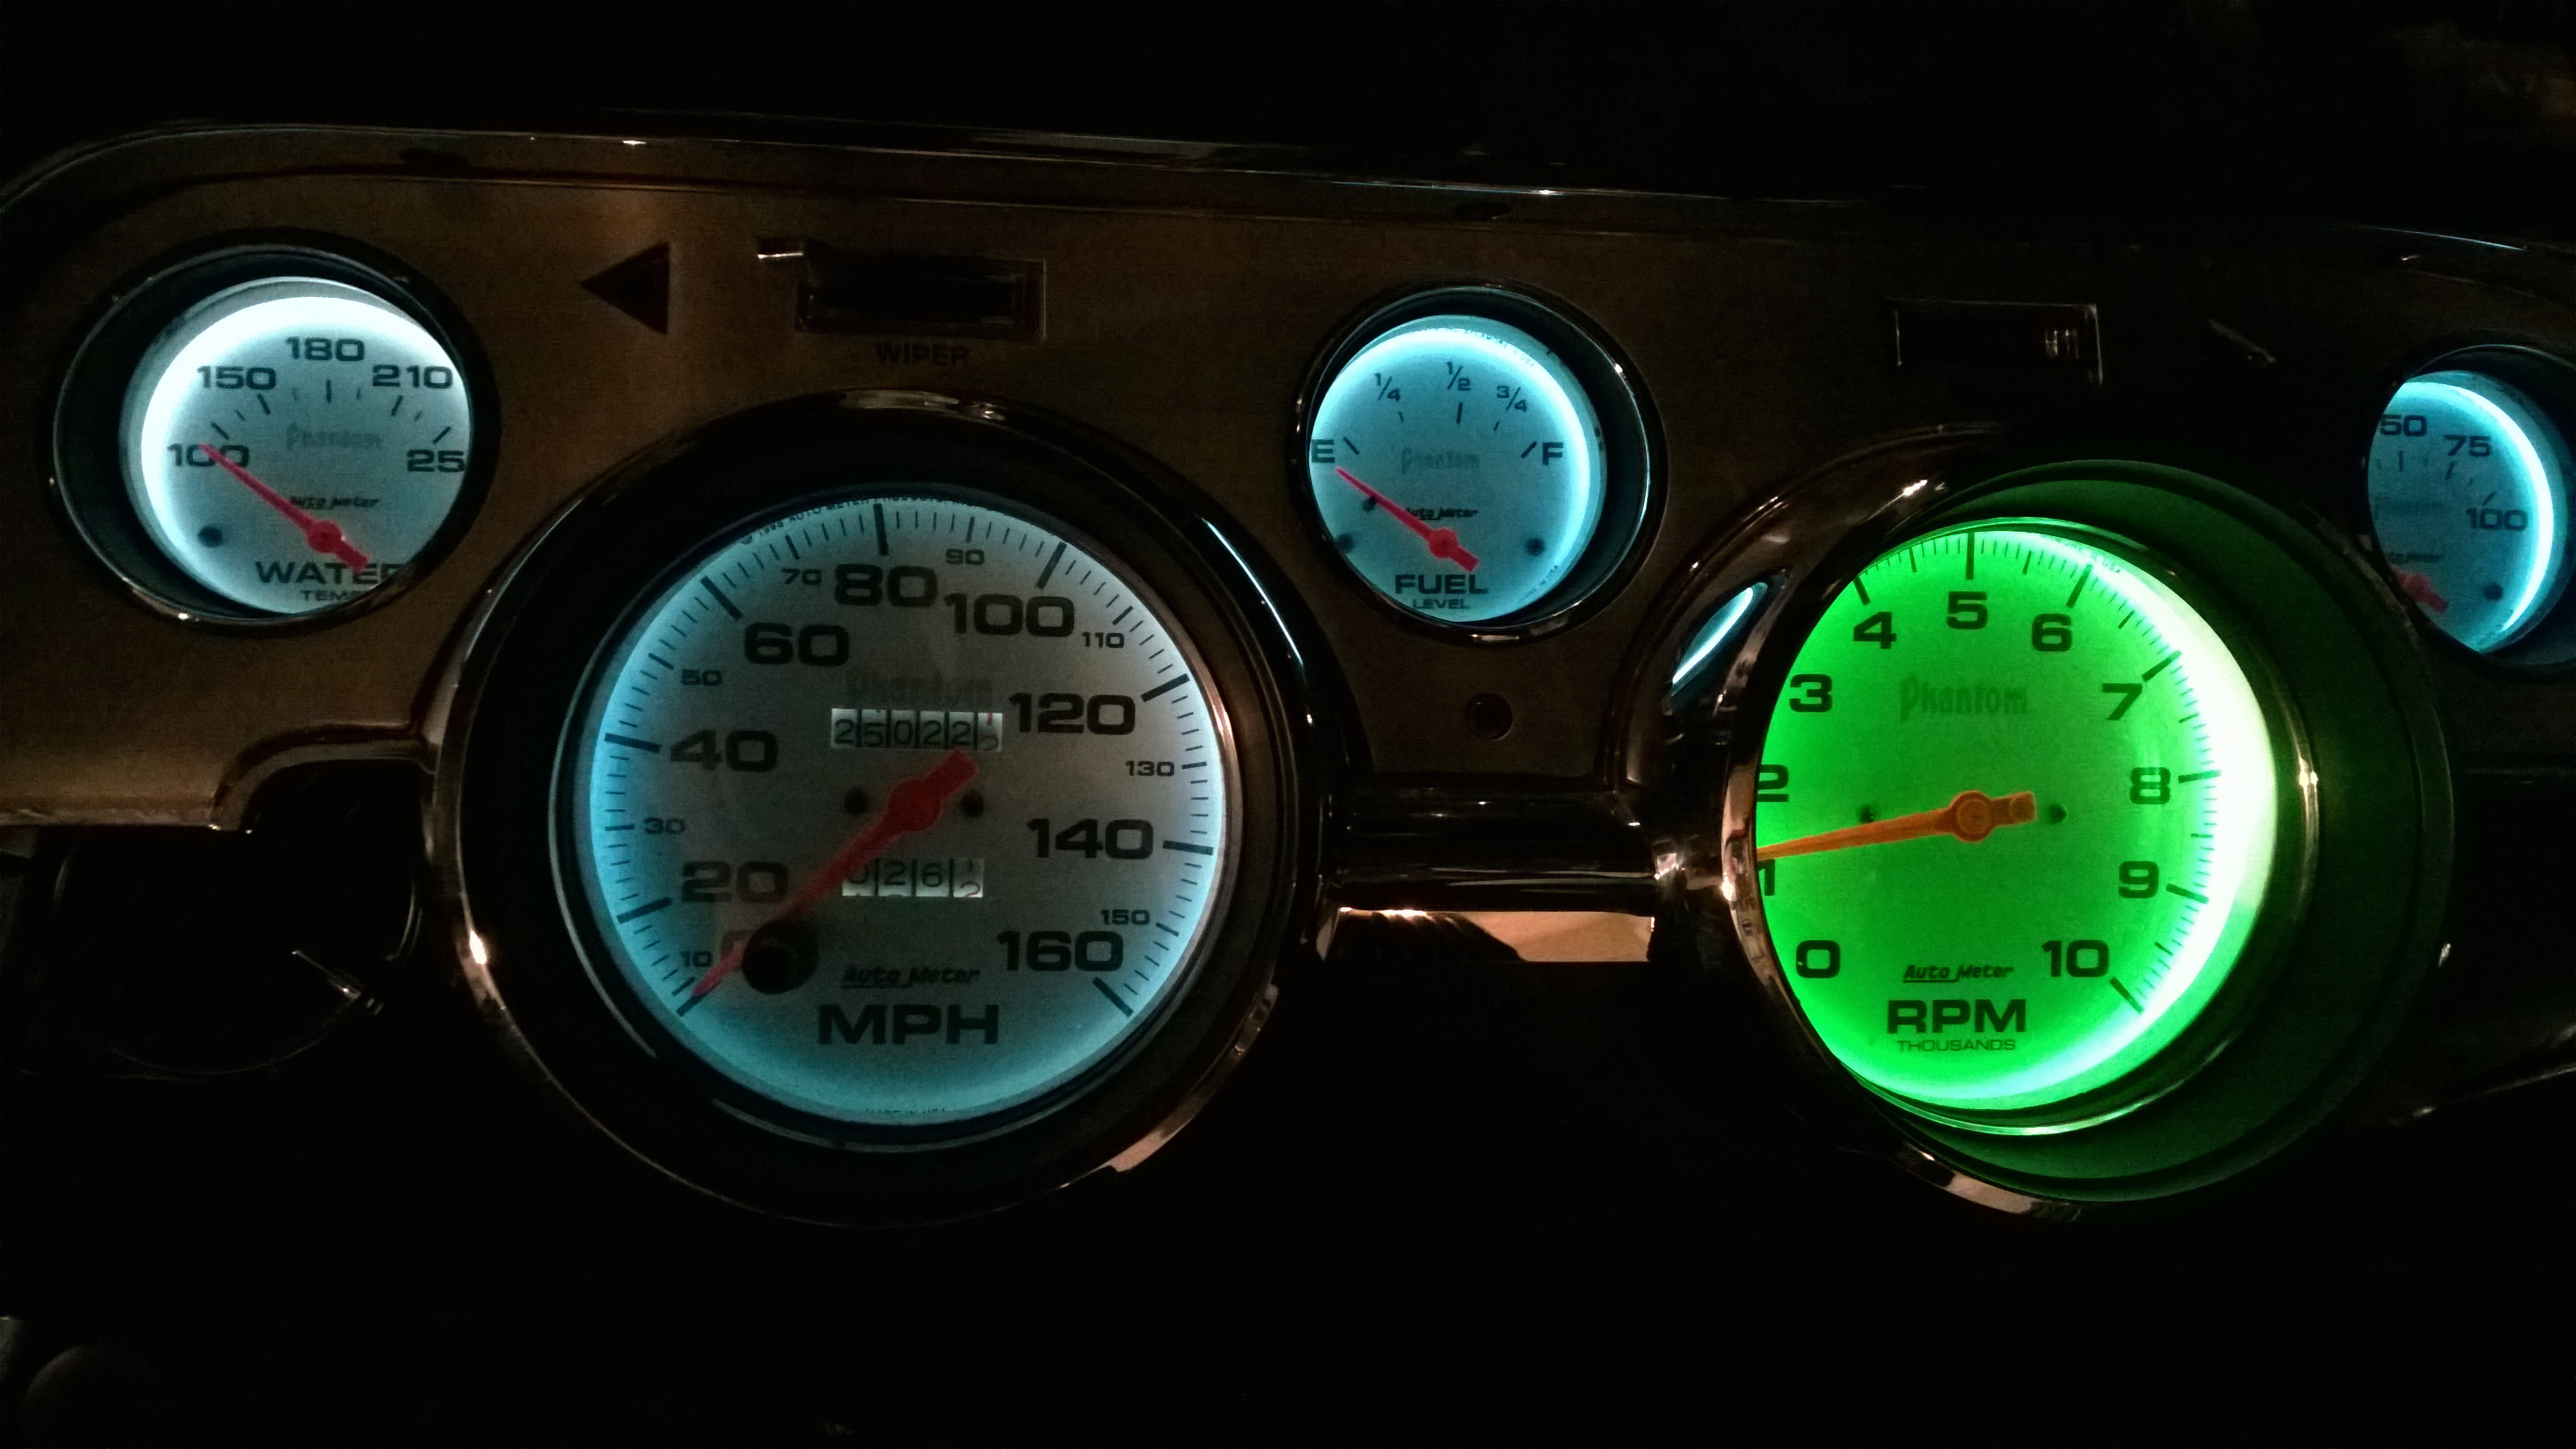
I think this picture speaks for itself in terms of how much brighter they are!
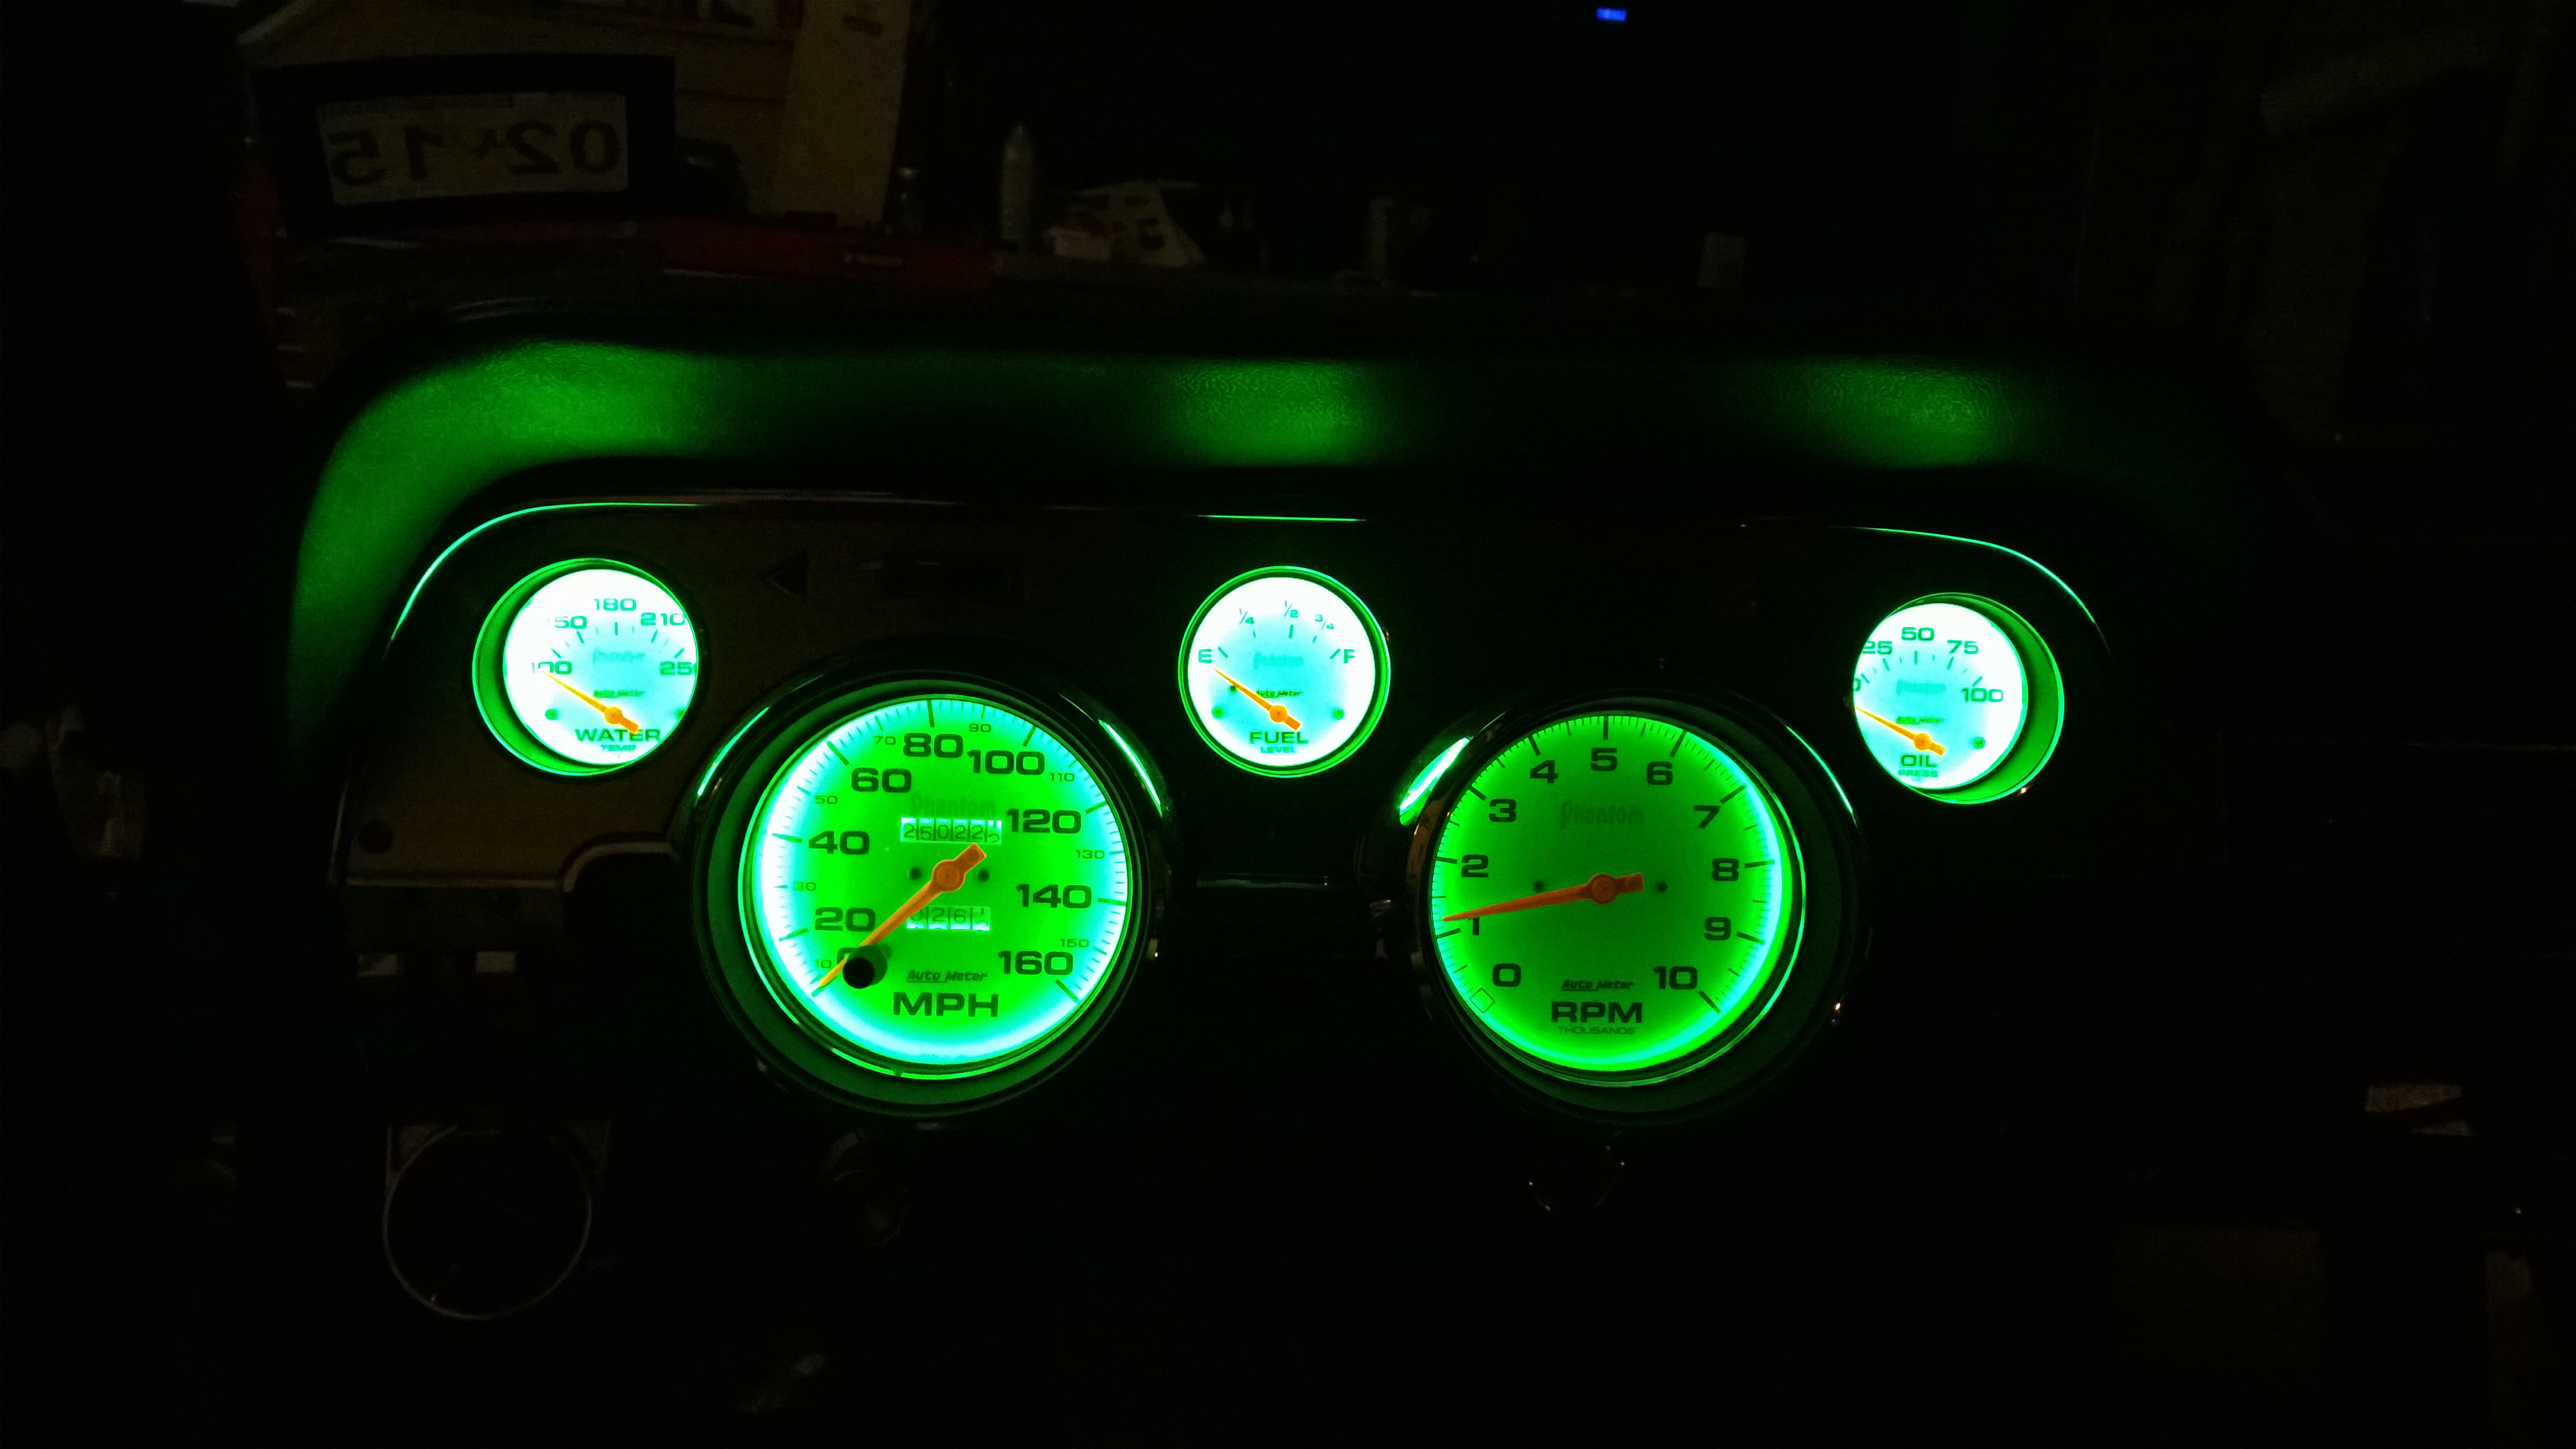
Here’s the cluster with all of the bulbs installed. My camera had a little bit of an issue with the light coming off the smaller gauges, they’re very readable and don’t seem to be too bright despite what the picture seems to show. One drawback is that the dimmer switch doesn’t really work anymore (there is a very slight dimming effect, but not like what you’d get with an incandescent).
Nonetheless, for about $7 per bulb (versus about $12 per bulb for the Autometer branded ones), I’ve got to say I’m extremely pleased!
Cambered Axle – Part 2
A little while ago I left you hanging with the Cambered Axle in our car not quite finished up yet. We’ve made a lot of progress since then!
The rebuilt axle is in! (more…)
2014 – A Year Behind the Wheel and Behind the Lens
At the end of the year, it’s a good time to look back and take stock of how you did. For me and this site, it means looking at several things – race results, media exposure, our most popular posts, and my favorite pictures of the year.
Before that though, I have a extend a huge thanks to our sponsors for this year, without them we couldn’t do what we do!
Hanchey Vehicle Technologies provided us with shock tuning services and stepped up with some additional support when we broke our rear shocks in June! These guys are pros and highly recommended by us.

We connected through Hookit.com with Lucas Oil in 2014 and have been extremely pleased with their products. With everything from engine oil to gun oil, they’ve got a product for your high performance need! We look forward to continuing our partnership through 2015 with them!
![]()
Another connection we made through Hookit.com was with Replay XD, provider of top-of-the-line action cameras. Through our partnership with Replay XD, we were the most viewed of Speedhunter’s #IAMTHESPEEDHUNTER videos, amassing more than 9,000 views with our featured video : A Camaro Built to Corner!
As always, we’re looking for new sponsorship opportunities for the new year. Please get in touch with us if you’re interested in being a partner!
Race Results, shall we? Click through to see more! (more…)
You get what you pay for…
Cliches can be very annoying and unfortunately they can be very true, such as “you get what you pay for”. This was reaffirmed to me in two ways this week, on the high end and on the low end!
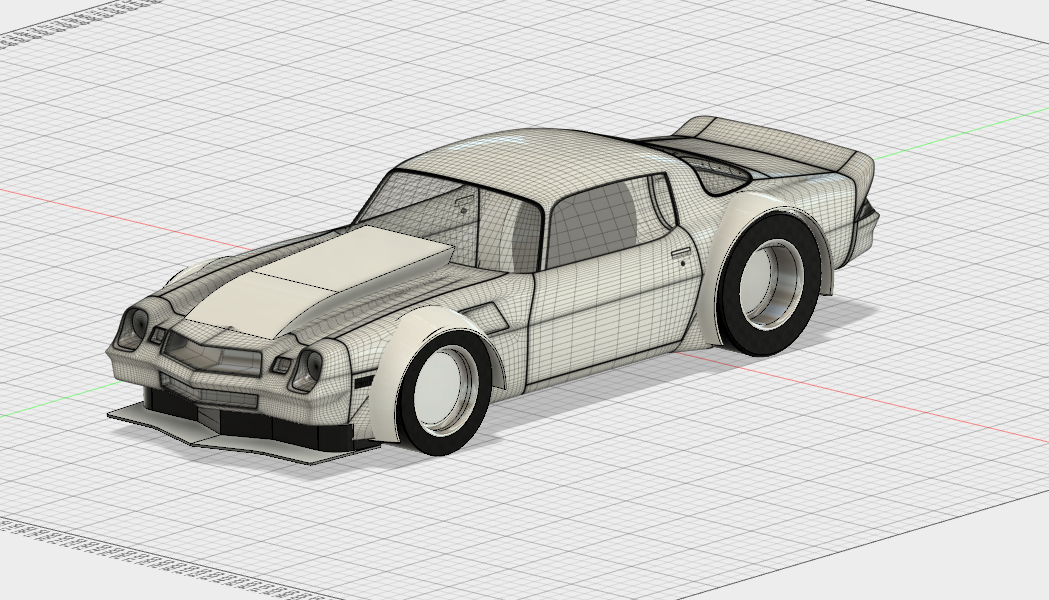
First, after much research I figured out that I could import a wide variety of files into Autodesk Flow Design, some of which the previously posted file from CGTrader.com would work. So, I went ahead, sent $90 to some guy in Czechoslovakia and minutes later I had a nicely rendered 1980 Z/28 Camaro! Shortly after this, I discovered that the software I have, while I can import, I could do little more than delete or scale the items in the model. With this, I was at least able to delete the wheels and tires. From there I could tack on bits and pieces. The modeled components I did are in solid white in the above shot. Unfortunately the rear spoiler couldn’t be deleted, so I couldn’t model anything like our spoiler… The front splitter came out looking ok and the wheel flares were close enough I figured for what I was doing. Side note, a huge thanks to Jennifer O’Brian for lending a hand with some model conversions!
After several go-arounds with Autodesk, I finally had my $35, 1 month subscription to Flow Design and was ready to get started! After looking at their videos online I thought I’d get something reasonably useful – “order of magnitude” – if you will on changes.
What did I end up with? Pretty pictures and a low-resolution movie. The videos do a good job selling the software, but at least at first try, it’s too simplistic for anything except the most rudimentary of analysis. Drag figures are wonderful, but really in the autocross world, we couldn’t care less about drag and more about downforce, a figure which appears to be absent from all the dialog boxes I found.
I may tinker some more with the software over the winter, but for the most part I’m shelving the project. Maybe down the road I’ll see if I can get a student or teacher to run some simulations using Simulation CFD since people within the education system get 3 years free.
At the least, I have a pretty 3D model of the Camaro that just maybe I can get molds made for new fender flares from!
Feeling Tubby and 3D Scanning Disappointment
I know it’s been a quiet few weeks, but we have been working on a few projects, namely wheel tubs, finishing up the rear end and some 3D CFD work that I have planned.

The wheel tubs are coming together nicely. Progressing from having a few holes… (more…)
Hoonicorn – Details
By now, anyone with a shred of interest in cars has probably seen Gymkhana 7, if you haven’t, just click through – and you’re welcome.
The star of that video though is really Ken Block’s “Hoonicorn” Mustang. Just posted today, Chris Harris has done a really cool video on the car.
Check it out!

If you missed it, you also have to check out this feature on Speedhunters on the Hoonicorn.
GT350 and the Day that the Mustang Broke the Internet
This was a huge week in the Mustang world. To say that Ford “broke the internet” might be understating what happened on Monday with Ken Block’s Gymkhana 7 and the amazing “Hoonicorn” Mustang.

Then there was Ford’s unveiling of the GT350.

Inevitably, when something as amazing as the new Shelby GT350 comes out, you get the “I’VE GOT TO HAVE THAT!” feeling. Such was my day on Monday when the images and details hit the web. How could I not want something that sounds so good, looks so good, and probably was going to be fast as heck?
Of course, no pricing details were revealed and availability on Ford’s website is tagged as “Fall 2015”.

A few days of thought and despite more pretty pictures and glowing articles, reality sets in that this thing is going to be expensive. Which got me to thinking… (more…)
Cambered Axle
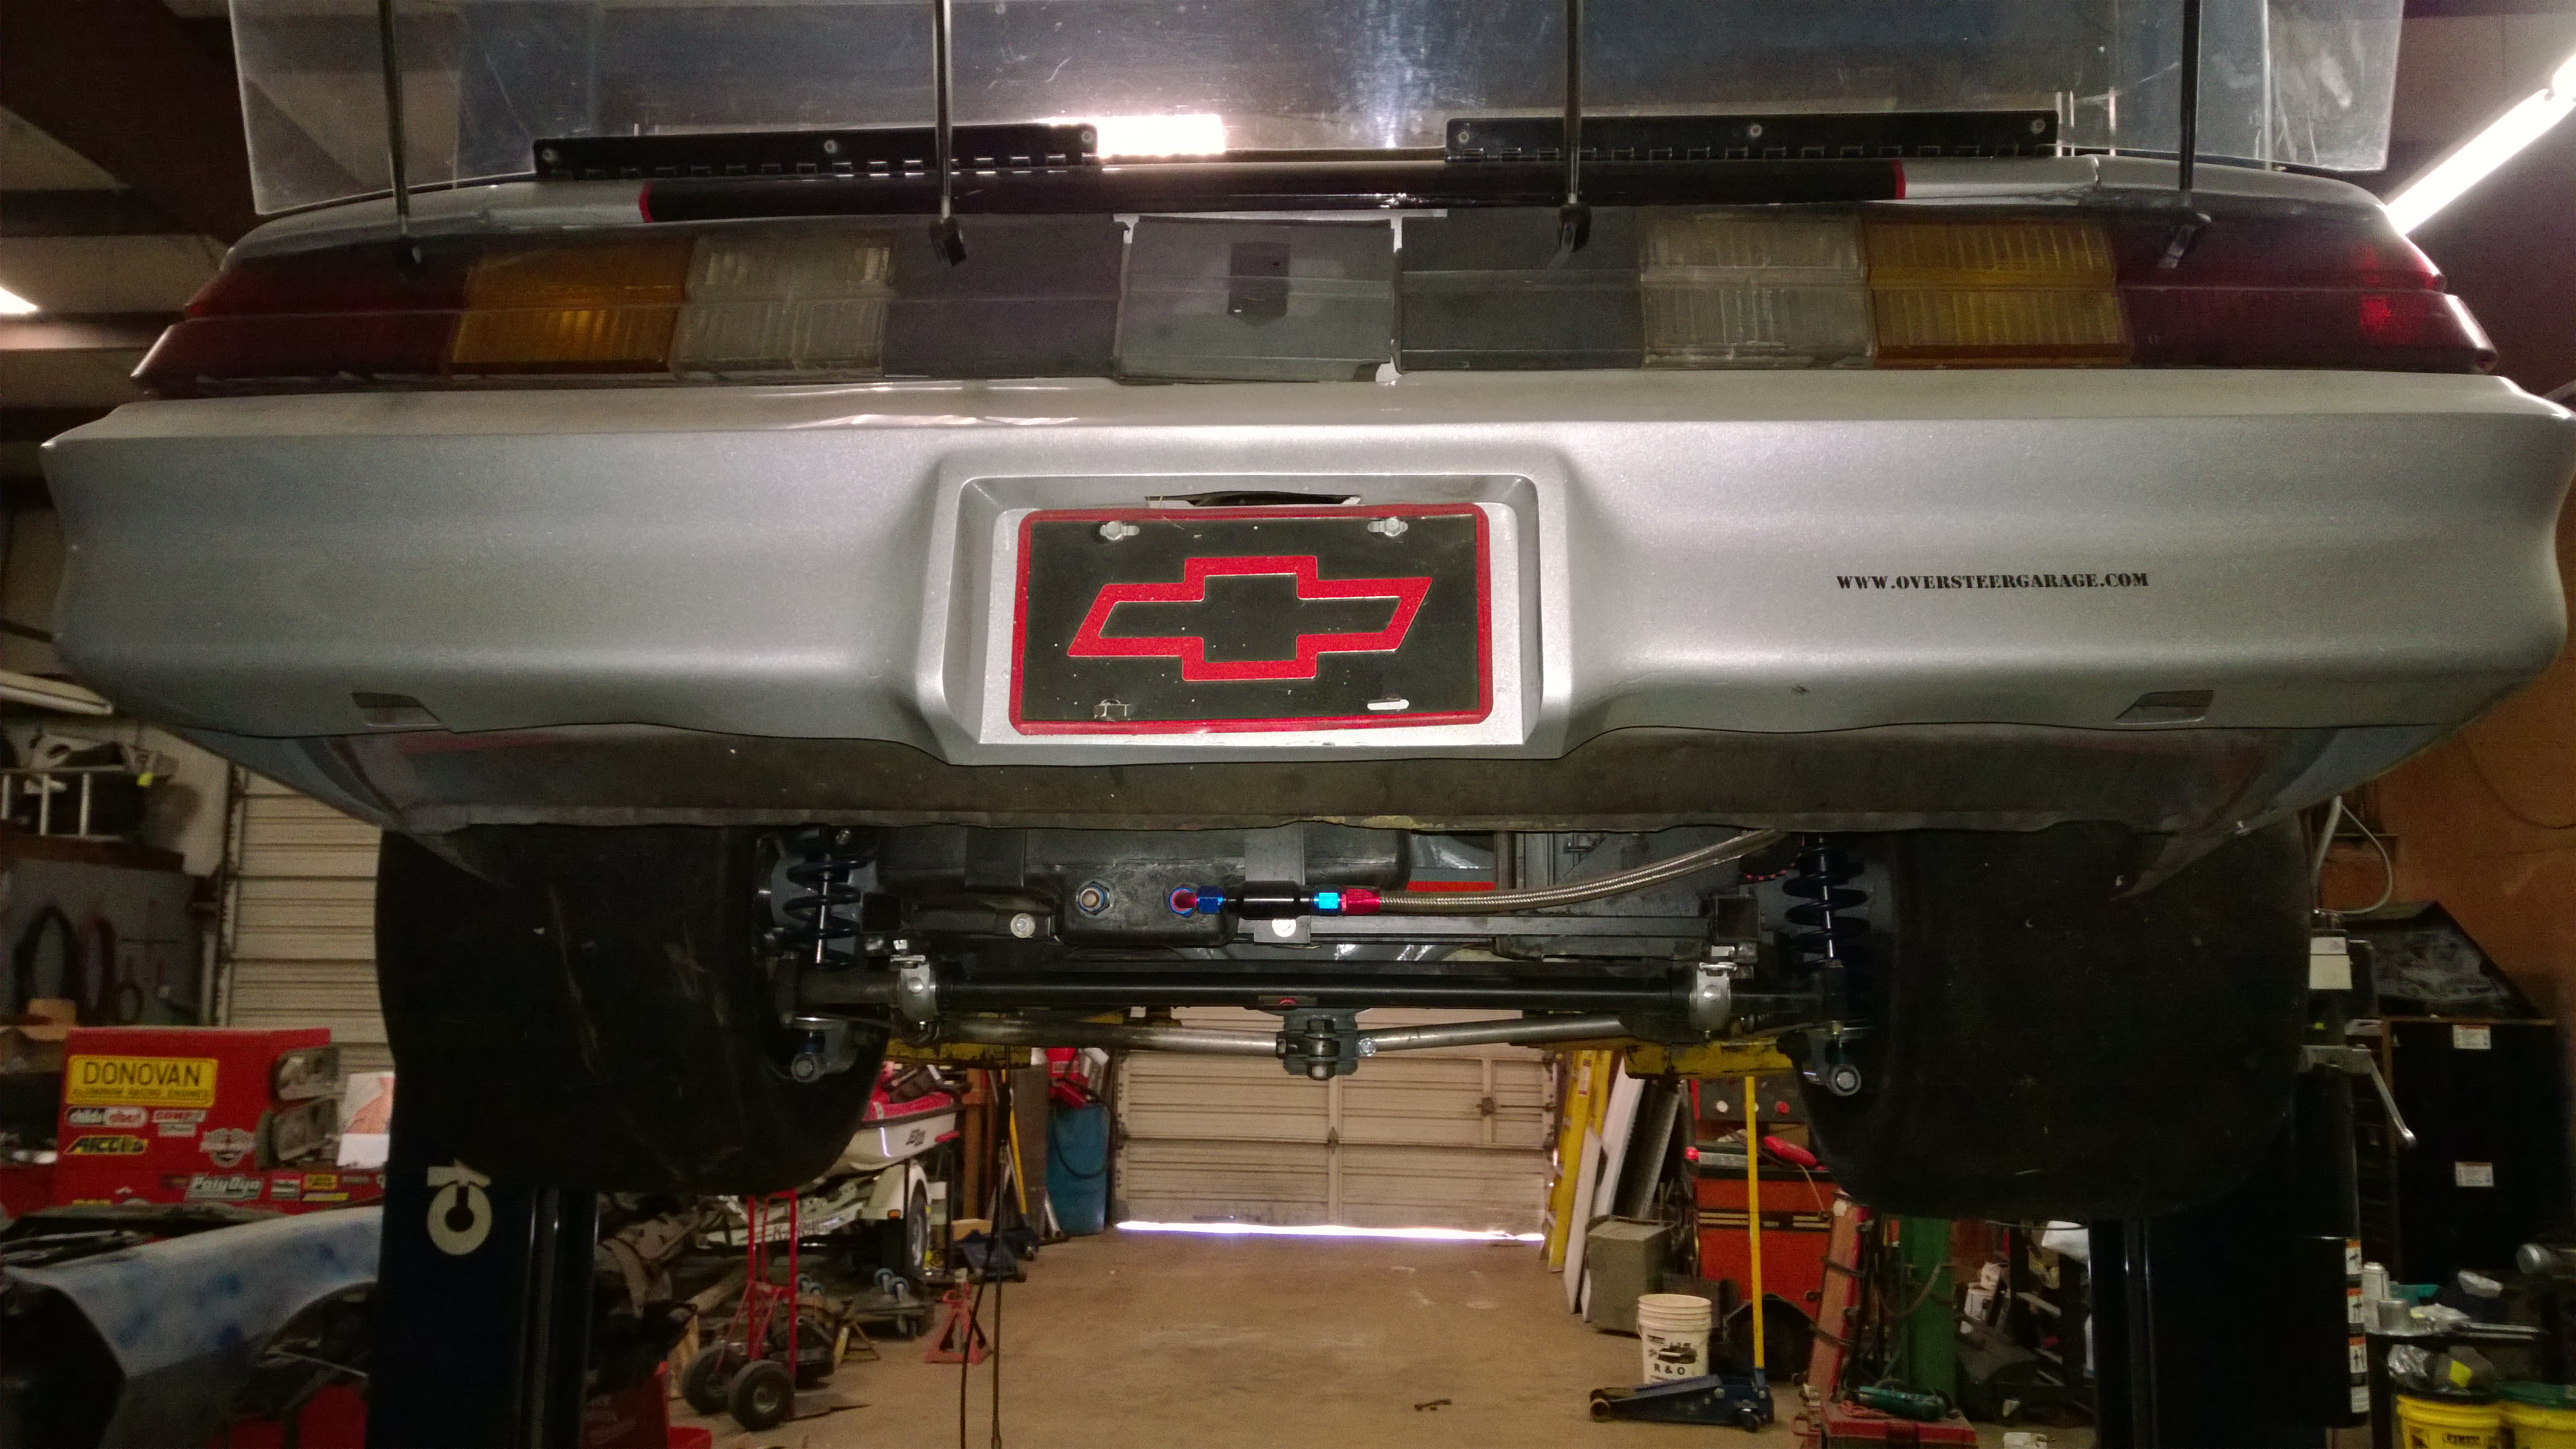
A couple of pretty big steps forward this week! Since our hub failure at Nationals, we decided to make some changes to the rear axle not only to fix the hub, but also to hopefully build in some options to start experimenting with tires. The new Hoosier and Goodyear Radials that GT-1 is running now appear to be a good option for autocrossing and with Goodyear phasing out the bias-ply tires that we like so much, the time has come to give the radials a shot.
One part of this is the radial tires require more camber than a bias-ply tire. Our old axle was “cambered” in that the top of the housing had been welded to bow the axle tubes up. This resulted in a little less than a degree of camber, just about right for bias-plys, but not enough for radials.

In order to accomplish this, based on Ron Ver Mulm’s recommendation, we stepped up to use cambered snouts from Tiger Rear Ends. These are great pieces and give us the option to change camber and toe if we ever decide too! The website is a little misleading… all of the parts say they are for a quick-change, but just about any axle with 3″ tubes can use their cambered snouts. (more…)
Fusion 360 Mini-Review and Remote Shifter Design
I know things have been quiet around here, but that’s not for lack of work! Kurt Janish has finished up the changes to our rear axle and Todd has been hard at work cutting out the wheel wells and making room for the big radial slicks that we’re going to try next year! More info to follow in a separate post on those projects!
In the meantime, I’ve been working on a few side projects to address some things with the car we wanted modified and also trying out some new software.
In the past, all of my 3D CAD work has been in Alibre Designs, a nice piece of software that works very similarly to SolidWorks which I learned in college. With a change in computers this fall and the difficulty in getting my license transferred (the company has changed hands since I originally bought it), I was on the lookout for an alternate 3D modeling software that was affordable.
I won’t go in-depth review wise because I haven’t used it all that extensively yet, but it is functional and serves my purposes well! Some key features that really sold it for me – fully featured and FREE for hobby users, SolidWorks part compatibility which let’s me use a wider variety of inputs compared to Alibre (which was a non-standard format), and it has drawing functionality (though less advanced than Alibre’s).

My first project in it was a design for a remote shifter. If you’ll recall from some time back, when we relocated the seat in the Camaro, it caused a need to extend the shifter handle far back. This had the negative effect of lengthening the throws and it just looked horrible.
This design is similar to a remote shifter that Mustang’s Plus put together, the Speedshifter. No longer available, I figured I could design something similar.
I think the end result should work pretty well, fingers crossed. This will also be my first trial of using an online machine shop, The Online Machinist. I’ll post back here how that works out!
Stay tuned for some more updates in the coming weeks as the car gets re-assembled!
Sponsors
 Red Line Oil
