
Steps Forward and Backward
Been a bit of a frustrating day at the shop. Step back to Friday and I get 2 / 3 orders for parts in, still missing the right lower ball joints that I need, but I can make do with what I’ve got.
The big step I needed to do was put in my mockup motor so that I could start making sure that the steering rack was going to fit and figure out where to put the upper shock mounts. Since we’re changing to 180 degree headers, this was a bit of a concern for us…

With the motor in-place I bolted up the headers… well, the driver’s side header. The passenger side was a different story.
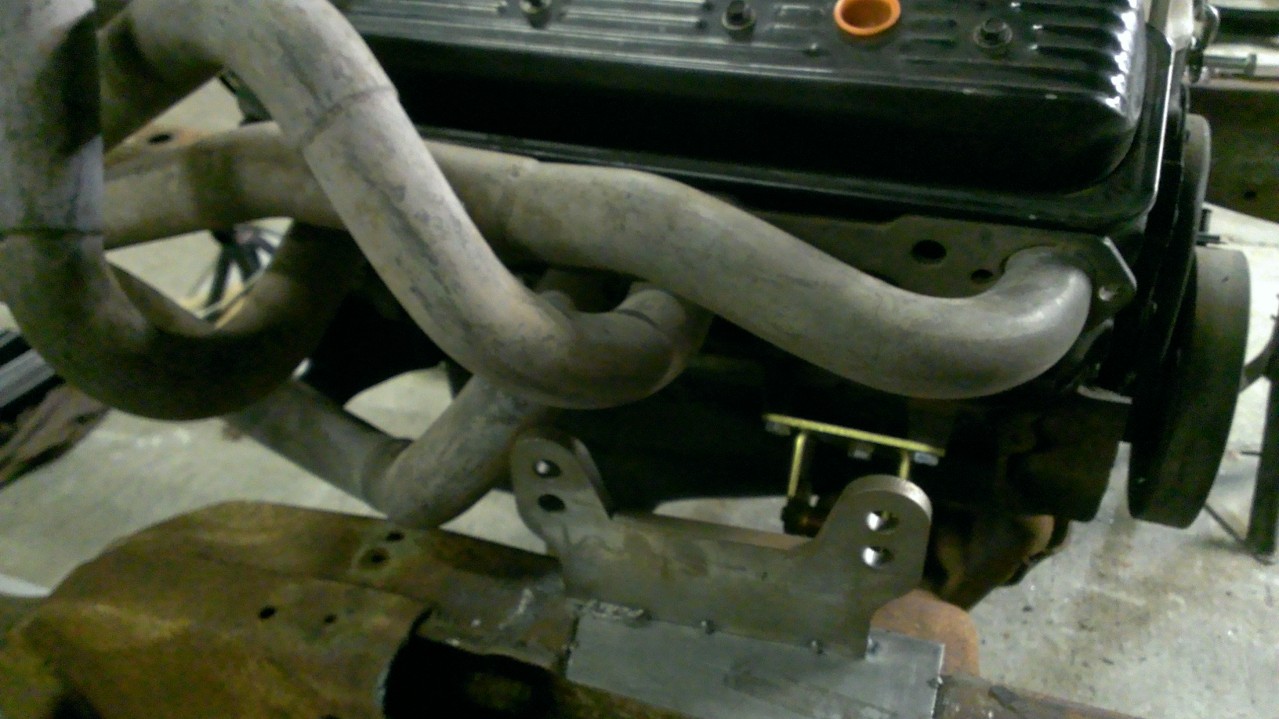
Have a bit of a clearance issue with the subframe. It’s good enough for my purposes now and I’ll deal with notching the subframe later IF we end up going with these headers. One thing that both Todd and I want is to ensure we’re still able to have a passenger seat and we’re not certain that will be possible with these headers…
Moved onto placing the steering rack and trying to bolt up the tierods and this is where the fail comes in…
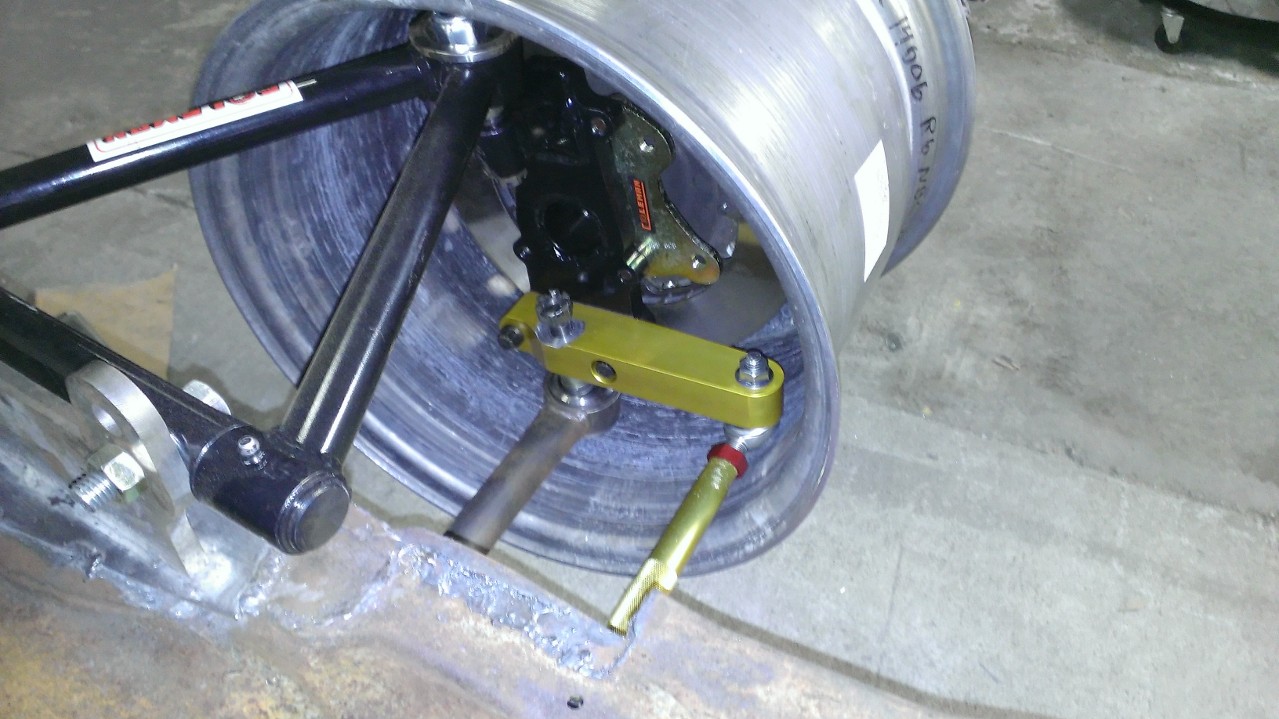
Looks great doesn’t it? Except the tierod nut hits the wheel… Worse, the tierod itself hits the wheel if you turn the wheel even a little bit. The tierod nut hitting the wheel I blame on a less than accurate 3D model of the steering arm, something I knew was going to be close, but unfortunately didn’t work out in my favor. I could get the arm machined to provide clearance, but then that pushes the steering arm up more and will make the bumpsteer worse!

This will be some ugly bumpsteer if not corrected… Why didn’t I catch this earlier? Two reasons: one I neglected to model in the tubing on the steering rack which is currently interfering with the harmonic balancer and two the harmonic balancer on the mockup engine is much larger than on our actual engine. So, this will not be quite the issue it appears to be here; however it remains to be seen if we can make this Corvette rack work or not.
Tomorrow is going to be spent making up some steering arm adapters to move the tierod pickup point to a more accessible location.
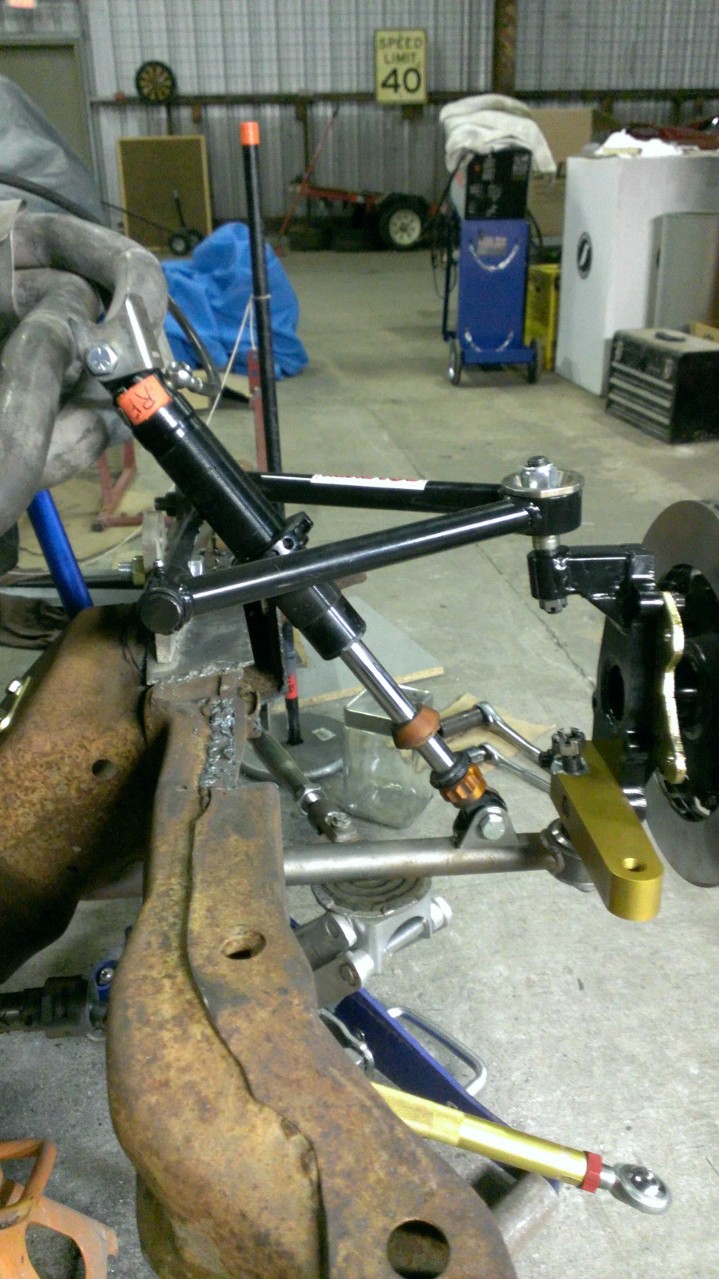
I did take the opportunity to get the shock mount put on the lower control arm so that any sort of steering arm changes could be checked properly for clearance.
I must say this project has been quite the learning experience. Couple steps forward and a couple steps back every day… Luckily none of the mistakes have been too terribly expensive, though I have a feeling that custom steering arms might be some $$.
 Red Line Oil
